Qu’est-ce qu’une vis sectionnable ?

Les vis à rupture, ou vis à casser, offrent une solution pratique pour éviter le gaspillage de vis standard. Elles fournissent exactement le nombre nécessaire, réduisant le gaspillage et offrant une certaine flexibilité. De plus, une méthode est décrite pour les ajuster à la longueur souhaitée. Ces vis sont désormais incluses dans certains produits de quincaillerie pour contre-portes.

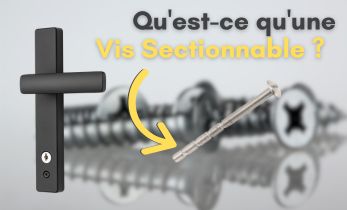
Les vis à rupture, également connues sous le nom de vis sectionnable ou vis à casser, sont des vis plus longues qui présentent des points de coupe à différents incréments d’un quart de pouce sur la longueur de la vis.

Contrairement aux paquets de vis standard qui sont livrés avec la quincaillerie ou achetés séparément, les vis à rupture de pont offrent à la fois une polyvalence et une agence pour l’utilisation des vis. Elles constituent en outre une option écologique. Poursuivez votre lecture pour en savoir plus sur les vis à rupture brusque et sur quelques méthodes pour les couper à la longueur souhaitée.

Les avantages des vis de rupture

Lorsque vous achetez de la quincaillerie de remplacement pour votre maison, comme des pênes dormants et des poignées pour une porte moustiquaire, vous recevez souvent un paquet de vis avec de nombreuses vis destinées à différentes épaisseurs de porte. Il faut alors trier, mesurer et éventuellement perdre des vis, pour n’en garder que deux dont on a réellement besoin, le reste étant laissé à l’abandon ou gaspillé.

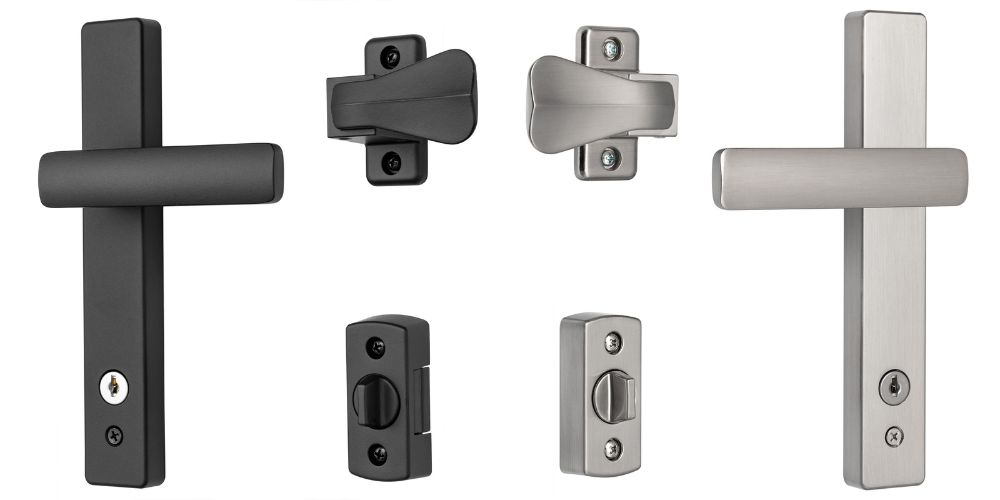
Les vis à rupture de pont résolvent ce problème en fournissant exactement le nombre dont vous avez besoin, généralement 2 pour les poignées de porte et les pênes dormants. Pour réduire l’encombrement inutile et faciliter la recherche et l’utilisation des bonnes vis pour les bons produits, une partie de la gamme de produits de quincaillerie pour contre-portes d’Ideal Security (listée ci-dessous) comprend désormais 2 vis à rupture de 3 po.

Les vis à rupture offrent également une certaine flexibilité ; vous pouvez ajuster leur longueur à vos besoins. Si vous préférez utiliser les vis de votre quincaillerie de contre-porte existant, ces vis réglables peuvent être facilement réutilisées pour d’autres projets. Il suffit de couper la longueur excédentaire selon les besoins.

Comment couper les vis de rupture

Avec les bons outils et une bonne prise en main, vous pouvez couper les vis à tête cassante à la longueur souhaitée. Regardez notre guide vidéo étape par étape pour apprendre à casser vos vis de rupture, et suivez les instructions ci-dessous.

Pour découper une vis de rupture, il suffit de :

  • 1 à 2 pinces (ou un outil de serrage similaire)
  • 1 mètre ruban ou règle
  • 1 gabarit de vis Ideal Security pour le matériel à installer

  1. Tout d’abord, mesurez l’épaisseur de votre contre-porte, de la surface extérieure (où est installée la poignée ou la serrure à pêne dormant) à la surface intérieure (où est installée la serrure intérieure ou la serrure à pêne dormant).
  2. Une fois que vous avez mesuré l’épaisseur de votre porte, se référer au gabarit de vissage fourni avec la quincaillerie de votre contre-porte Ideal Security – l’épaisseur de votre porte sera associée à la longueur de vis que vous devez couper.
  3. Après avoir identifié l’encoche de la vis qui doit être coupée, prédécoupez votre vis. Pour ce faire, serrez la pince sur l’encoche, tournez la vis d’un quart de pouce, serrez à nouveau et répétez l’opération 4 à 8 fois. Une deuxième pince peut être utilisée pour maintenir la vis en place.
  4. Saisissez l’encoche prédécoupée avec la pointe de votre pince et appliquez un léger mouvement de haut en bas pour casser l’encoche de votre vis de rupture. Si la vis a été correctement prédécoupée, l’encoche devrait se détacher sans qu’il soit nécessaire d’exercer une force excessive.

Poignées et pênes dormants pour contre-portes – Désormais avec vis de rupture

Dans le but de promouvoir le respect de l’environnement et de réduire les déchets, nous avons commencé à introduire des vis sécables dans certaines de nos gammes de produits, dont le lancement est prévu entre janvier et juin 2024. La gamme de produits comprend :

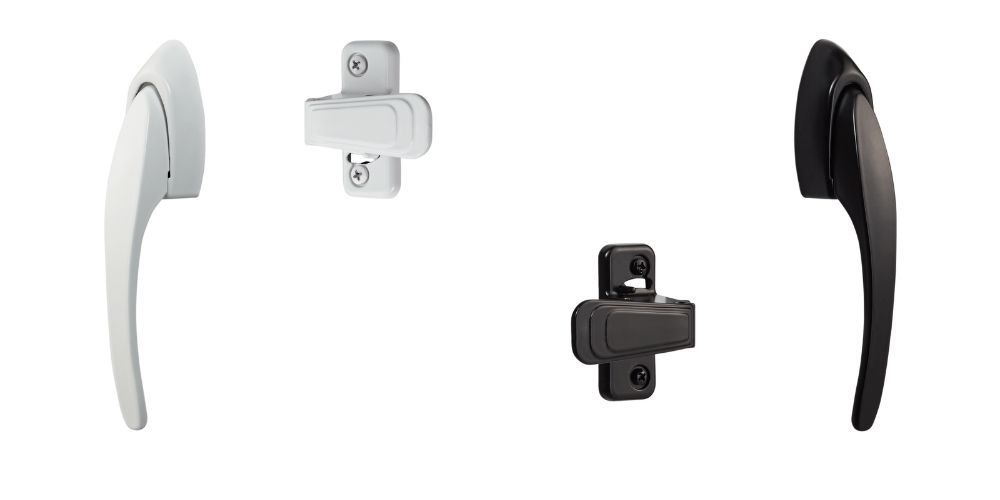
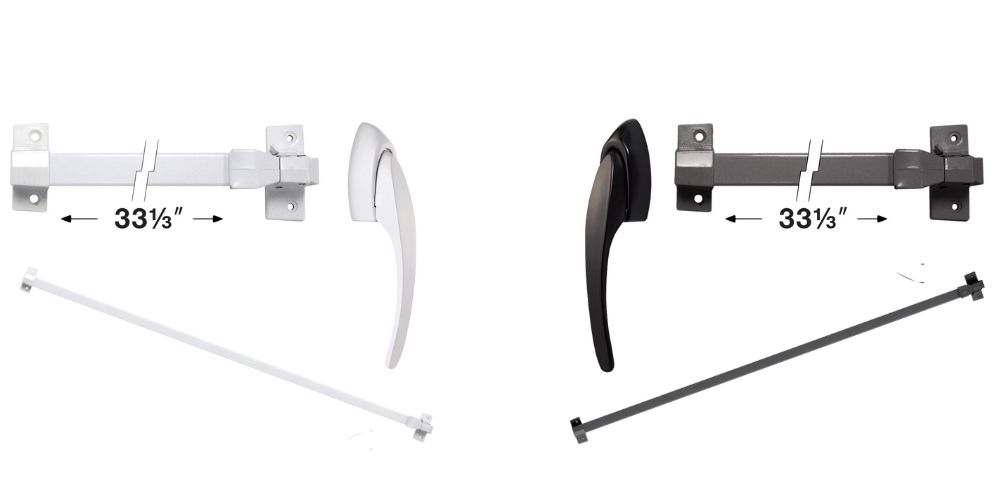
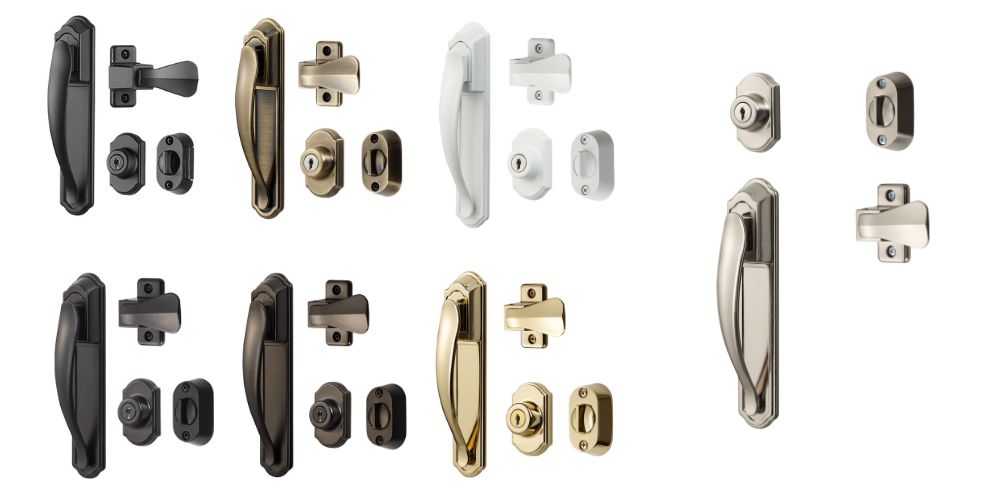
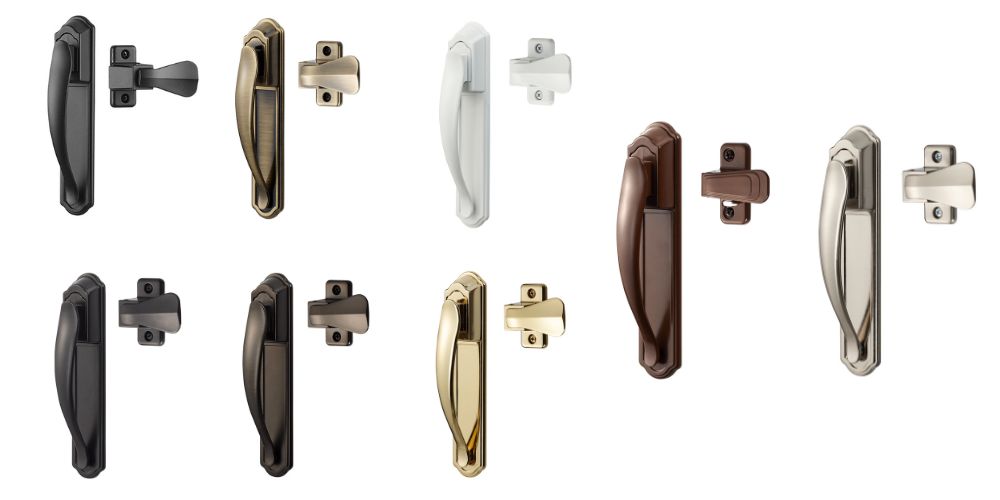
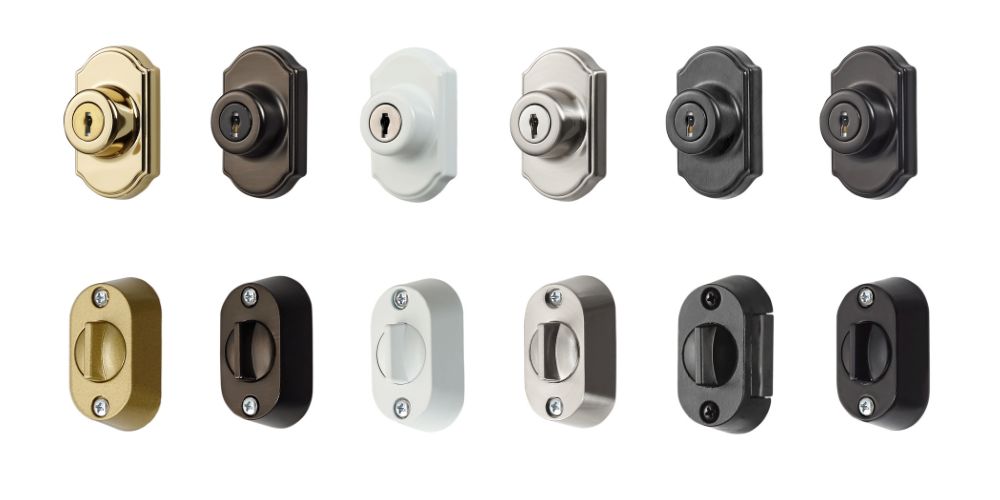
La série de serrures à clé pour contre-portes 703

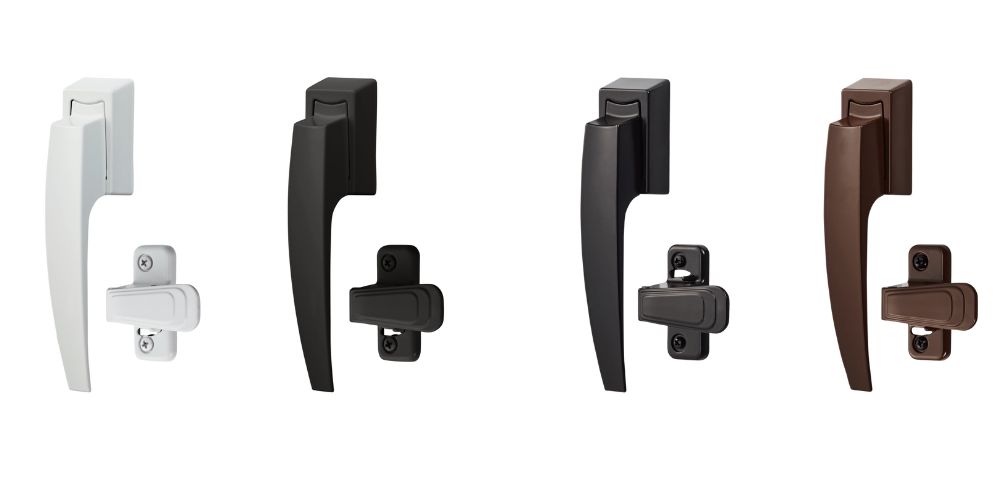
La poignée tirante pour contre-portes VP

La poignée tirante pour contre-portes CS

La poignée de tirage 4390 pour contre-portes et la série de barres tactiles intérieures

La série de poignées de tirage pour contre-portes LSDXCR2267

La série de poignées de tirage pour contre-porte DX

La série de levier pour contre-portes EL

Vous avez des questions ou des préoccupations ? N’hésitez pas à nous contacter ! Vous pouvez nous contacter ici ou visitez notre gamme complète de produits de remplacement de quincaillerie de contre-porte.

What Type of Ladder Can I Use on Stairs?

Curious about the types of ladders that are safe to use on stairs? We’ve got you covered. Check out this post to learn about ladder types and the various tips and tricks to keep in mind when using a ladder on stairs.

Sometimes, you’ll find a spot above the stairs that you just can’t quite reach. Maybe it’s to repaint one off-color corner, hang up a painting, or perform HVAC work. In times like these, the only solution is to use a ladder on stairs.

Read on, and we’ll walk you through the best types of ladders to use on stairs and a quick breakdown of ladder types.

When you’re done, come on back and learn how you can use a ladder on staircases without relying on bulky, time-consuming, and potentially risky staircase scaffolding.

The Safest Ladders to Use on Stairs

First and foremost: do not use single-rail ladders. According to OSHA (1926.1053(b)(21)), that is a hard and fast rule, regardless of whether or not you plan to use a ladder on stairs.

With that out of the way, there are a surprising number of ladders that can be used on stairs. From combination ladders to extension ladders, most types of ladders can be used on stairs conditionally. Some ladders have integrated mechanisms that allow the adjustment of individual legs to provide level heights for staircase use, while others require the use of accessories and ladder stabilizers. Even ladders that are exclusively made to be used on stairs come with some conditions and caveats, so be sure to thoroughly review any documentation that comes with your ladder to determine the ideal usage conditions.

Below, we’ll go over the general ladder types that can be used on stairs to help you make informed purchasing and ladder-use decisions. If there’s a ladder type missing from this list that you think works well on stairs, let us know!


Single Ladders

Tried, tested, and true, single ladders come with no flourishes or frills. Requiring no additional tools for general use, relying steadily on their anti-slip feet and the support of the surface it’s placed against, single ladders come in various heights ranging from 10 feet to over 30 feet. Note that single ladder height is not adjustable. Be sure to check the required height needed for your project before purchasing a ladder.

While ladder height was commonly used as an indicator of weight capacity (the taller the ladder, the more weight it could support), that is not a reliable metric nowadays. Some single ladders as short as 10 feet are capable of supporting up to 300lbs.

Note that you’re not necessarily better off by buying the tallest ladder available! As noted by the American Ladder Institute, using a 14-foot ladder makes working on the surface of a wall around the 10-foot mark problematic, due to the 1 in 4 rule. Click here to learn about the 1 in 4 rule, which determines the amount of space needed to safely use a ladder depending on its height.

Accessories / Tools needed to use on stairs: Yes.


Extension Ladders

Exactly as the name implies, extension ladders… extend. That may not sound particularly exciting at first, but extension ladders offer a great deal of versatility that you’d otherwise miss out on with a single ladder.

Coming in with two to three adjustable telescopic sections, extension ladders can reach heights up to 40 feet, if not higher. Unlike their limited single ladder counterparts, extension ladders are generally not restrained to their maximum height, but can rather be incrementally adjusted and held in place with rung locks. Some extension ladders come equipped with a rope and pulley system to help set the telescopic sections in place.

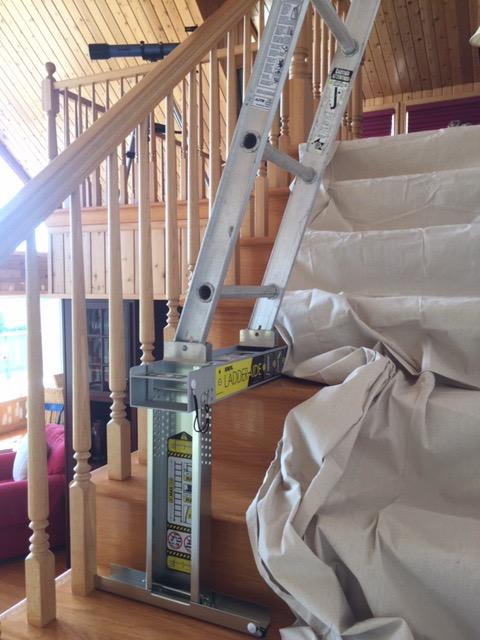
To use an extension ladder on stairs, you’ll need to employ the use of ladder accessories and leveling tools. Like single ladders, extension ladders meet regulations for the use of levelers and stabilizers to balance out uneven surfaces, making them viable candidates for use on stairwells and sloped surfaces. With the right ladder accessory or ladder leveler, you’ll have a suitable adjustable ladder for stairs in no time.

Note that this adjustable height doesn’t necessarily free extension ladders from the 1 in 4 rule, and extension ladders are not a “one-size-fits-all” tool. If you are using an extension ladder like the aforementioned 40-footer, that means the base, unextended ladder is going to be at least 20 feet tall; trying to reach the surface of a wall at or below the 16-foot mark will be a risky endeavor.

Accessories / Tools needed to use on stairs: Yes.


Combination Ladders

Bringing in the best of both worlds, combination ladders can act as stepladders, extension ladders, or single ladders, making them a unique and essential tool on a job site with various ladder requirements.

While the stepladder aspect of a combination tool cannot be used on stairs, the single ladder and extension ladder configurations can be used as described in the two previous sections. Be sure to check the manual and guidelines that come with your combination ladder for specific use case requirements.

To facilitate the single-step-extension ladder combo, combination ladders generally operate with a series of locking joints. When using your ladder in any one of the three configurations, ensure that all necessary joints are properly locked in place – the last thing you want is for your stepladder to suddenly turn into a single ladder while in use.

Accessories / Tools needed to use on stairs: Yes.


Articulating Ladders

Articulating ladders, also known as multi-position ladders or multi-purpose ladders, break the mold when it comes to ladders. Best described as a jack of all trades, articulating ladders, through a series of moving hinges, can transform into single ladders, extension ladders, stepladders, stair ladders, and potentially more. Some articulating ladders feature independently adjustable legs, meaning you may even be able to configure them to step ladders for stairs.

Discussing articulating ladders can be a bit challenging, as every manufacturer may aim for something different with their own ladders. Some multi-purpose ladders may be able to transform into ladders for stairways out the box, while others may still require the use of ladder levelers and stabilizers. Be sure to follow the manufacturer’s guidelines for ladder usage, and avoid MacGyvering your ladder to adapt to situations it’s not intended for.

The same rules apply nonetheless; one size does not fit all, mind the 1 in 4, make sure the feet are properly grounded, and ensure all hinges are properly locked. Additionally, with the number of hinges and varied use cases of a multi-position ladder, take extra care in checking your ladder for defects from wear and tear.

For more safety tips on using articulating ladders, be sure to check out the American National Standards Institute’s blog.

Accessories / Tools needed to use on stairs: Sometimes.


And more…

Undoubtedly, there are some specialty ladders for stairs, or interesting combinations of ingenuity and stubbornness to get the job done. However, official safety regulation tends to dissuade against these homemade remedies, and we’re inclined to agree with the folks over at OSHA and ANSI.

It’s no exaggeration to say that using a ladder can be dangerous in certain circumstances, and doubly so can be said if you’re using a ladder on stairs. It can be done, and there are safety measures in place to do so properly. It’s just a matter of actually following those regulations, doing some research, and investing in the right tools for your safety.

What Are Ladder Types?

Now that we’ve gone over the best ladders to use on stairs, we’ll quickly touch on ladder types, or ladder duty ratings.

There are five accepted and commonly used ladder duty ratings to familiarize yourself with. They are, from least weight capacity to most weight capacity:

  • Type III
  • Type II
  • Type I
  • Type IA
  • Type IAA

Ladder duty ratings indicate the weight that a ladder is capable of supporting. This includes the weight of the person using the ladder, the weight of the tools in use, and the weight of the equipment being worn. For the safest ladder usage, these combined weights should be less than your ladder’s maximum weight capacity.

In addition to determining the correct ladder height for a job, you should consider the application of the job, the site, and the working load you’ll be putting your ladder through. For example, Type III ladders are generally best regarded for household applications and simple tasks.

It doesn’t stop there. If you’re using ladder accessories and leveling tools, you must also consider their weight capacities, taking into account the weight of the ladder itself atop the previously mentioned factors. Optimally, you should aim to use tools that can support up to 4x the weight capacity of your ladder.


Interested to learn more? We’ve got you covered. Check out this blog post to learn about the various types of ladder accessories and tools at your disposal to use ladders on uneven surfaces, roofs, and stairs.
A Guide To Garage Door Extension Springs

There comes a time when hardware we take for granted needs replacing, and garage door springs are no exception. Between the wear and tear of time and constant use, garage door springs will gradually weaken and warp, resulting in an imbalanced garage door. With the right information in mind and tools in hand, what was once a complicated and potentially risky replacement process will instead be a safe and simple task.

Note: There will always be an element of risk when replacing garage door springs. Be cautious, wear protective equipment, and when in doubt, contact professionals.

Torsion Springs and Extension Springs

Before replacing your garage door springs, you should first determine the type of springs you have. These are generally split into two categories with their own subcategories, but we’ll focus on the main two – Torsion Springs, and Extension Springs.

You should be able to figure out which of the two your garage door is equipped with at a glance – Extension Springs are long, slim, and run parallel to your garage door’s horizontal tracks on either end of your garage door. In stark contrast, Torsion Springs are thick and bulkier, and are located directly above your garage door opening.

Both spring types operate by providing a counterbalance to your garage door, but the means they achieve this counterbalance is what sets them apart from one another. Extension Springs essentially “pull” your garage door open with a lift cable that runs from the spring to the bottom of the garage door. Torsion Springs rotate and either wind or unwind to close or open your garage door, respectively.

The majority of residential garage doors use extension springs, whereas torsion springs are generally used for industrial or commercial doors. However, if your home features a particularly heavy or large garage door, it may be using torsion springs.

Identifying Broken Garage Door Springs

Unlike other components of garage door hardware, it is easier to determine when a garage door spring has passed its prime.

Visually, you might notice a gap in your spring that’s wider than the usual distance between the coils. That tends to indicate a weakening spring. More telling signs often occur when it’s too late to get a bit more mileage out of a spring. Generally, those signs tend to be:

  • A garage door that fails to open
  • A garage door that slams shut
  • A crooked, imbalanced garage door
  • A rather loud bang or snap as the garage door spring finally gives out

Identifying The Right Replacement Springs

Extension springs are often color-coded to indicate the weight of garage door they can support and the length they stretch to. While a good rule of thumb is to replace your garage door extension springs with those of the same color, this method may not always be reliable. With time, your springs may lose their color, making it more difficult to properly identify them. Furthermore, not all manufacturers color-code their springs the same way.

Another way to identify your garage door springs is to measure the inner diameter of your spring. However, this method is not ideal, as spring diameter can differ due to varying manufacturing processes and spring materials.

The preferred method to determine the type of spring you need is to weigh your garage door after your old springs have been disconnected and removed. Upon removing your old springs, close your garage door on top of a scale to get an accurate reading of your garage door’s weight. Be sure to also measure the height of your garage door.

With that information in tow, you can begin searching for extension springs that support the weight and height of your garage door. Most manufacturers will readily have a spring selection guide or chart available to help you select the right extension spring for your garage door, much like our own chart below.

Installation Tips

When replacing your garage door extension springs, here are some tips to keep in mind:

  • Replace both springs to ensure your garage door remains properly balanced
  • Use this opportunity to replace old garage door hardware, such as pulleys and rollers. Your garage door uses springs, pulleys, and rollers in conjunction with each other. Making sure that these components are in good shape and are working in harmony is an essential step to ensure you have a smooth, silent garage door.
  • Make sure you are installing the correct type of springs. Note that this guide covers extension springs intended for sectional garage doors, which are not the same as torsion springs.

Installing Garage Door Springs

For a thorough guide on installing garage door springs, check out our installation video. In this instance, a visual representation will better guide you to properly install your garage door extension springs. You can also follow along with the brief overview list below:

  1. Open your garage door, and block it from closing
  2. Disengage your electric door opener
  3. Unhook the s-hooks and remove your garage door pulleys
  4. Remove the old springs and safety extension cables
  5. Pass the safety extension cable through the new spring
  6. Hook the spring to the attachment hook on the rear hanger bar
  7. Attach the safety extension cable to the slotted angle bracket nearest to the stationary pulley
  8. Attach the pulley onto the spring, and thread the extension cable onto the pulley
  9. Pull the extension cable until fully tensioned to the initial s-hook position and reattach it

With that, your garage door should be set to operate for a number of years without the need to replace its springs.

Ready to replace them? Check out Ideal Security’s Garage Door Extension Springs, tested for up to 15,000 cycles. While you’re at it, consider revamping your garage door entirely with tried and tested pulleys and rollers.

If you’re on the fence about replacing your garage door rollers, or don’t know what type of roller to select, check out this article where we dive deep on the function and types of rollers.

How to Secure a Window With an Air Conditioner Installed By Using a Security Bar

Gearing Up For A Secure Summer

After reading this guide, you will be aware of a variety of options for adding security to a window with an air conditioner in it, and be able to choose the best options for your specific needs.

Know what you’re looking for, and keen to jump the line? Check out our Sliding Door Security Bars and Window Security Bars below.


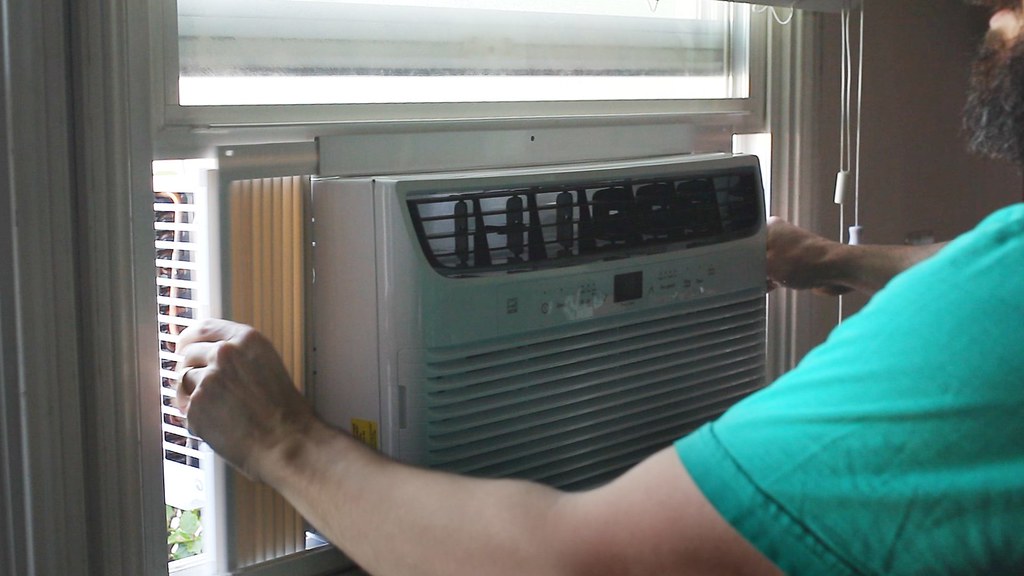
With summer arriving, you’re probably gearing up for the hot weather, and this means installing your AC window units and portable AC units. While these things are great for keeping you physically comfortable, we know they can sometimes leave you feeling emotionally uncomfortable.

Why?

Because according to Safe At Last, burglars commonly choose houses with window air conditioning units.

Window air conditoning units provide one of the easiest entry points to a home

With that air conditioner sticking out of your window, there’s nothing keeping the window locked! Not a big deal on the third floor of an apartment building, but what about those of us who live on the ground floor? Or even on the second floor with an easily accessible balcony? Suddenly the built-in locks on our windows are useless, and anybody walking by can just slide them open and walk right in.

The good news is you don’t have to compromise safety for comfort. There are some great options for adding extra security to a window with an air conditioner in it.

When doing market research for our new window security bars, we developed a lot knowledge about the best ways to secure a window with an air conditioner installed, whether it be a vertical window air conditioner or an air conditioner in a sliding window. If you’re struggling with the same questions, we’ve got some answers for you below.

Note: Yes, we make a window security bar. And yes, we think it’s the best option on this list. But we try to offer impartial advice. None of these are affiliate links, and we don’t make any money from this content

Quick Run-Down of the Options

  1. Any ol’ piece of wood
  2. Sliding window locks
  3. Ideal Security’s Adjustable Window Bars
  4. Window alarms

Tried and True: Any Ol’ Piece of Wood

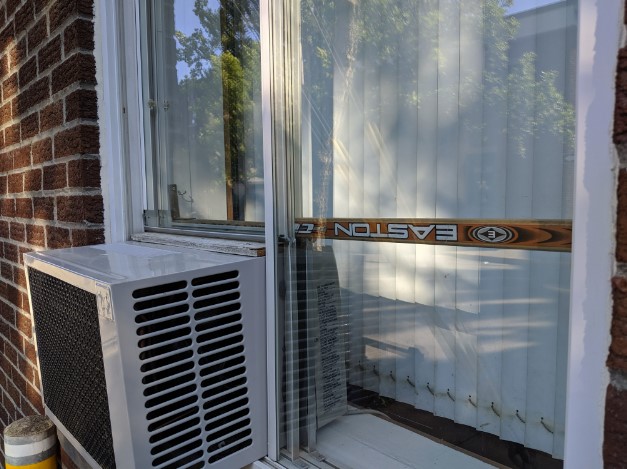
We’ve all seen it, and that’s because it works. Just grab an old hockey stick, broken broom, or whatever else you’ve got lying around. Cut it down to fit your window and lay it in the track if your window slides horizontally or jam it into place in a vertical hung window. Remember, if you’re measuring for a vertical window, you’re going to want a nice tight fit to keep it from falling over.

Just watch out. If you get the measurements wrong and it’s too short, it may not be secure at all. Remember, measure twice, cut once.

Pros

  • Cheap
  • Nothing to buy (if you already have equipment and materials lying around)

Cons

  • Ugly
  • Requires tools and comfort using them
  • Time and energy
  • Room for error

Sliding Window Locks

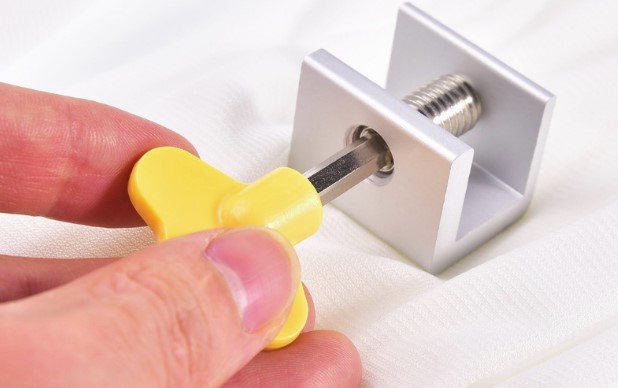
These things are pretty cool. They’re little locks that you fix onto the sliding track of the window to block it from opening.

They’re super easy to install, usually don’t require any tools, and are pretty affordable. There are also so many different styles, designs, and vendors, which could make it difficult to identify one that will work on your window or find reliable quality. They work by holding onto the track with pressure, so quality here is going to be super important. We didn’t test any, and have no idea how we’d choose.

Also – and this is a big problem for anyone worried about safety – they’re basically impossibleto remove in an emergency. There are egress regulations about this sort of thing, and it was a huge consideration for us when we were designing our own security bars. If you’ve got kids or a disabled family member, or you’re just thinking ahead to a situation where you might need to quickly get out of your house, these locks may be problematic.

Pros

  • Inexpensive
  • Effective (depending on quality)
  • Easy to install

Cons

  • Difficult to remove in an emergency
  • Too many potential vendors and styles

Wedge Locks for Sliding Windows

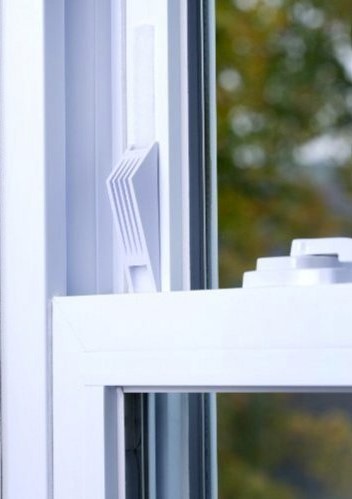
These function similarly to the sliding window locks we discussed above, but with some notable differences. Instead of being screwed onto the track, you just jamb these into place against the profile (easier to understand from the picture than to explain).

That makes them easy to remove for emergency exit, but sacrifices both security and convenience. All a potential burglar has to do is jiggle the window enough to reduce the pressure, and the top-heavy wedge might fall out of place. And every time you adjust the window, you need to reseat the wedge to ensure it’s still solidly in place.

Pros

  • No installation necessary
  • Removable for emergency exit

Cons

  • Rely on pressure for security
  • Could fall out of place
  • Don’t remain in position when the window is adjusted

Ideal Security’s Adjustable Window Security Bars

We’ve made our 110 Security Bar for Sliding Patio Doors for years, and it’s one of our best-selling products. People love that it’s easy to adjust so you can size it for your door with no cutting and it lets you lock your door in an open position to let air in but keep intruders out. They also love the pivoting bracket to lift it out of the way when you want to open your door completely.

Last year, Diane (one of our team members who handles customer support in addition to her roles as ERP Champion and Product Coordinator) noticed a new trend: Customers had started asking about shorter bars to accommodate windows and pet door inserts.

Well, we listen to our customers, especially when they’re telling us what they need. A few years ago we added a unique child- and burglar-proof Anti-Lift Lock to our 110 bar, which was a big success.

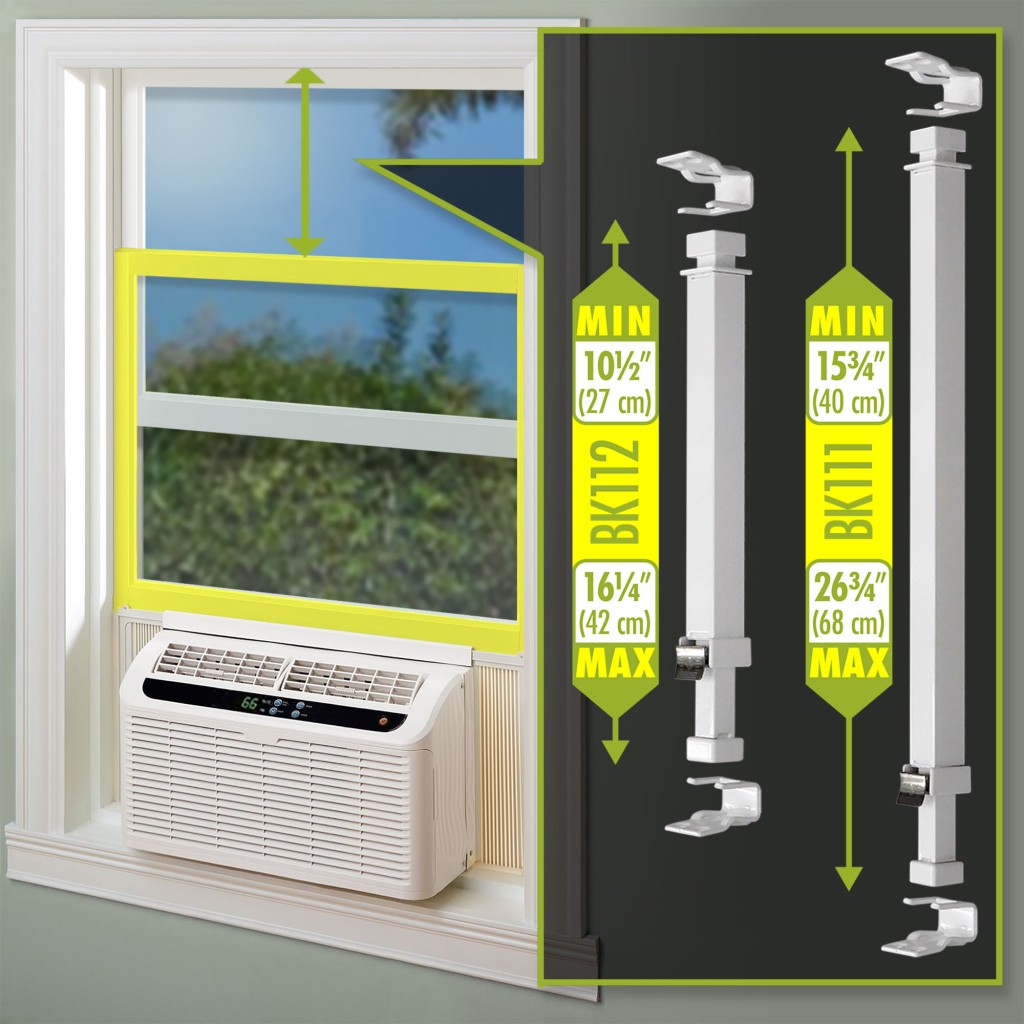
So after a ton of market research and some design tweaks from our engineer Dex, we introduced the 111 and 112 bars. These are shorter versions of the 110, designed specifically for sliding windows and narrower sliding doors.

Features from the 110 Bar

  • They adjust super easily by just pressing on the release button, letting you open and close a window at will.
  • They auto-lock when you let go of the button, letting you lock a window in any position – closed, slightly open for ventilation, or with an air conditioner installed!
  • They include the anti-lift lock.

Differences – Features Designed Specifically for Windows and Narrower Doors

We changed two things about the 110 bar:

  1. Instead of the the pivot bracket, they have saddle brackets at both ends. Why? This makes them compliant with egress regulations. The bar can be removed quickly and easily in an emergency, allowing the window to open to its full size.
  2. Includes super-strong adhesive tape in addition to screws for installation. Why? This makes them compatible with a wider range of tracks and profiles (see below). They’re also even easier for you to install, and you can remove them without leaving holes behind.

One thing to note, though: Due to the many different styles of window tracks and profiles out there, there are some that aren’t compatible with our saddle brackets. Most notably aluminum windows with multi-grooved tracks.

Pros

  • Easy to install
  • Adjustable to fit any size window
  • Easy to remove in an emergency (complies with egress regulations)
  • Useful even when the air conditioner is gone

Cons

  • May not work on all windows. Depends on profile and track type.
  • Doesn’t feature the same pivot hinge as the bigger security bar for sliding doors

Window Alarms

Even a locked window can be broken… After all, it’s just a glass pane. And once broken, any bars or locks you have in place can be unlocked, giving a potential burglar free access.

Locks and security bars work because most burglars commit crimes of convenience. They find an open window (or a window that can be opened easily), climb in quietly, take what they can quickly, and get out.

An easy and cost-effective way to level up your family’s safety is to add an inexpensive window alarm. Here’s a few stats for you:

  • About 60% of convicted burglars said that a security system influenced their decision to target another home (source).
  • A whopping 74% of all unsuccessful burglary attempts failed because of an alarm that emits a loud sound (source).

You can easily add a basic, no-frills alarm to any window or door. For example our SK604 and SK605 contact sensors are great, low-cost units that are super easy to install and emit a loud alarm if your window is opened unexpectedly.

Pros

  • 74% of all unsuccessful burglary attempts failed because of an alarm
  • Easy to install
  • Adds a second layer of security

Cons

  • Doesn’t prevent intrusions, but will scare off a burglar

Conclusion

Just because you’re installing an air conditioner for the summer doesn’t mean you have to sacrifice your home security or your family’s safety. Be a hero! Use one or more of these add-on security products, and sleep comfortably in a cool and secure home.

Water Safety Around The Home And Garden

photo-1521207418485-99c705420785Around ten deaths a day are due to accidental drowning, and one in five of those are children under the age of 14. Teaching children about water safety around the home is an important part of their learning. It doesn’t take much for a child to drown, but flooding can also be a serious problem in the home when taps are left on. Along with education, there are devices that can warn you before this happens to help keep your home and family safe.

 Cameras And Lights Can Improve Safety In The Garden

 75% of drowning deaths in children under 15 years old occur at a private residence, such as a family pool or a neighbor’s. Having a swimming pool or a pond in the backyard can make your home more enjoyable, but it presents risks to everyone, especially children. Children should be taught water safety and how to swim and tread water, should they ever fall into a pool. When someone is used to being in the water, they are less likely to panic if they fall in, and have a better chance of saving themselves. Having cameras and motion sensor lights around your pool can increase the chance of you noticing when someone falls into your pool or pond, and you will be able to help them quicker. You should also fence around pools so there’s less risk of falling in, and keep ponds away from where children will play.

 Kitchen And Bathroom Safety

 Kitchens and bathrooms have a lot of potential water safety issues, such as sinks and the bathtub. Drowning is the biggest risk, so young children should never be left unattended when using the kitchen or bathroom, but there’s also a risk of flooding if a faucet is left running, which can cause significant damage to your home. Bathtub and sink fill devices can be placed on the edge of the tub or sink at the maximum height you want it to be filled. When the water hits the sensor, a tune or alarm will go off to remind you to turn off the taps or notify you that someone has left them on. This is particularly useful for busy parents and people with memory problems, such as elderly family members.

It’s important that children aren’t afraid of water or swimming pools, but that they understand the risks involved and how little water is needed for drownings to occur. Teaching children to swim will make them more confident in and around the water, and if they ever find themselves in trouble, they’ll be more likely to be able to save themselves.

Image Source: https://unsplash.com/photos/vDQ-e3RtaoE

Garaga’s Most Common Garage Door Problems, and how to solve them

Garaga‘s one of the top North American garage door manufacturers, so when they talk we listen.

photo3-4

They recently posted a list of the most common garage door problems they encounter, and some suggested solutions.

Garaga’s Top 5 Most Common Problems with Garage Doors

  1. The door opens or closes with a thud
  2. The door has come off its hinges
  3. Sometimes the door opens and sometimes it doesn’t…
  4. When closing, the door goes down a little and then suddenly goes back up
  5. There’s a power outage!

The good news is, they provide some easy DIY ideas for how to solve those problems. For instance, if your garage door is closing too hard, you may need to replace your springs (with something like Ideal Security’s Garage Door Extension Springs).

You can see their whole article here: http://www.garaga.com/blog/en/common-problems-garage-doors/

Using lights to notify your neighbors of problems

fountain-1090180_1280

We recently got a great question about our SK627 Temperature Alarm from HomeDepot.com:

Can I get this to turn on a lamp so that low temps can be observed from outside my home?

We thought this was a super clever question.

Cottage life

We already know that our SK6 Home Monitoring Series is great for monitoring a cottage or vacation home, where you may not have internet service or want an expensive, complicated smart-home system. Our system works over regular ol’ landline telephones, doesn’t require WiFi, and works on batteries even during a power failure. It can alert you by phone to low temperatures, power failures, leaks, floods, and more.

But what if your cottage doesn’t even have a land-line?

Or you’re going on vacation and will be unreachable?

Or you’re hours away from your cottage – What will you do once you find out about a problem?

Notify your neighbors with light

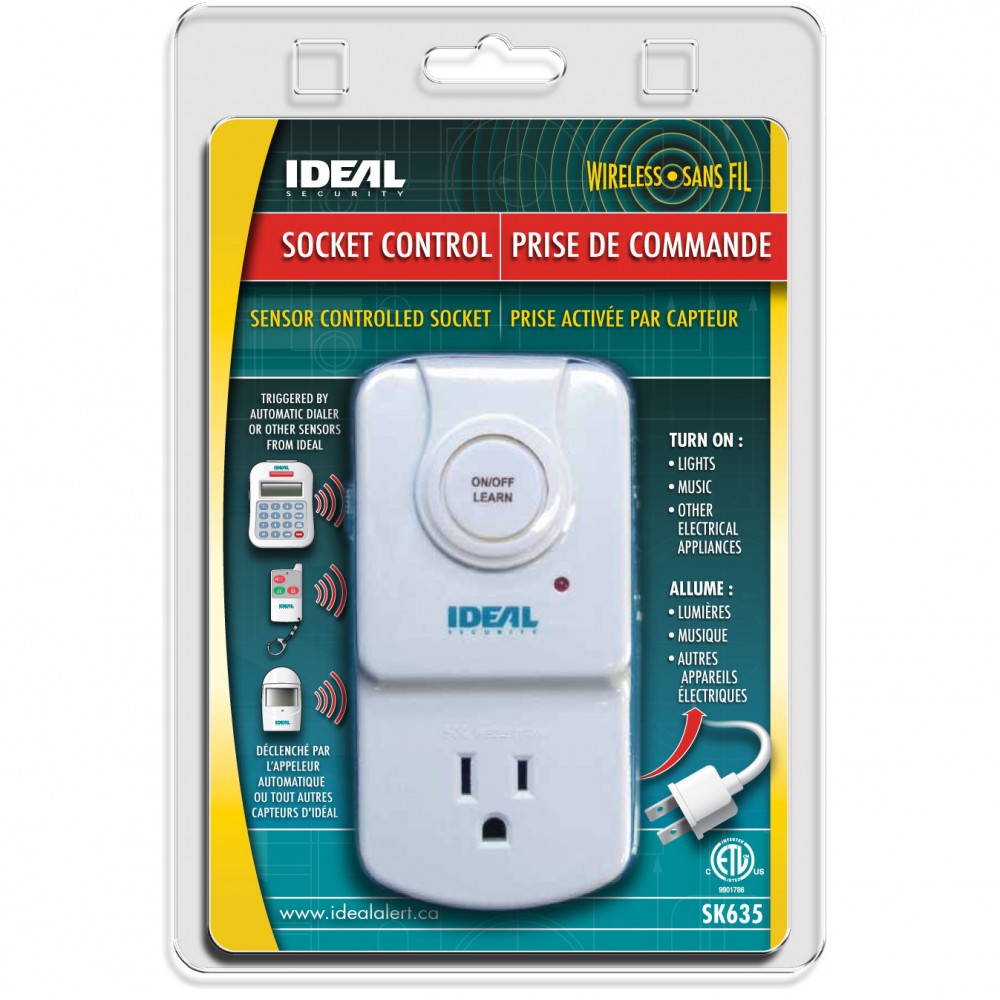
A clever way to address those problems – and make sure your friends or neighbors can respond to a problem in your home – is to add a SK635 A/C Outlet Controller into your system. With the SK635, you can use any regular floor-lamp or desk-lamp to signify a problem.

sk635_1

Plug the SK635 into your A/C wall outlet, plug the lamp or light into the SK635, and turn on the lamp. By pairing the SK635 to a power failure sensor, a water sensor, a temperature sensor, or any of our other sensors, the lamp will turn itself on when triggered by one of those sensors.

Train your neighbors

Now all you have to do is train your neighbors. Put the lamp in your front window, and tell your neighbors to watch out for it. If they see lights on in the house, they’ll know there’s a problem. If they’ve got a spare key, they can go in and shut off the water, flip the breaker, or call for help if there’s a more serious problem.