A Guide To Garage Door Extension Springs

There comes a time when hardware we take for granted needs replacing, and garage door springs are no exception. Between the wear and tear of time and constant use, garage door springs will gradually weaken and warp, resulting in an imbalanced garage door. With the right information in mind and tools in hand, what was once a complicated and potentially risky replacement process will instead be a safe and simple task.

Note: There will always be an element of risk when replacing garage door springs. Be cautious, wear protective equipment, and when in doubt, contact professionals.

Torsion Springs and Extension Springs

Before replacing your garage door springs, you should first determine the type of springs you have. These are generally split into two categories with their own subcategories, but we’ll focus on the main two – Torsion Springs, and Extension Springs.

You should be able to figure out which of the two your garage door is equipped with at a glance – Extension Springs are long, slim, and run parallel to your garage door’s horizontal tracks on either end of your garage door. In stark contrast, Torsion Springs are thick and bulkier, and are located directly above your garage door opening.

Both spring types operate by providing a counterbalance to your garage door, but the means they achieve this counterbalance is what sets them apart from one another. Extension Springs essentially “pull” your garage door open with a lift cable that runs from the spring to the bottom of the garage door. Torsion Springs rotate and either wind or unwind to close or open your garage door, respectively.

The majority of residential garage doors use extension springs, whereas torsion springs are generally used for industrial or commercial doors. However, if your home features a particularly heavy or large garage door, it may be using torsion springs.

Identifying Broken Garage Door Springs

Unlike other components of garage door hardware, it is easier to determine when a garage door spring has passed its prime.

Visually, you might notice a gap in your spring that’s wider than the usual distance between the coils. That tends to indicate a weakening spring. More telling signs often occur when it’s too late to get a bit more mileage out of a spring. Generally, those signs tend to be:

  • A garage door that fails to open
  • A garage door that slams shut
  • A crooked, imbalanced garage door
  • A rather loud bang or snap as the garage door spring finally gives out

Identifying The Right Replacement Springs

Extension springs are often color-coded to indicate the weight of garage door they can support and the length they stretch to. While a good rule of thumb is to replace your garage door extension springs with those of the same color, this method may not always be reliable. With time, your springs may lose their color, making it more difficult to properly identify them. Furthermore, not all manufacturers color-code their springs the same way.

Another way to identify your garage door springs is to measure the inner diameter of your spring. However, this method is not ideal, as spring diameter can differ due to varying manufacturing processes and spring materials.

The preferred method to determine the type of spring you need is to weigh your garage door after your old springs have been disconnected and removed. Upon removing your old springs, close your garage door on top of a scale to get an accurate reading of your garage door’s weight. Be sure to also measure the height of your garage door.

With that information in tow, you can begin searching for extension springs that support the weight and height of your garage door. Most manufacturers will readily have a spring selection guide or chart available to help you select the right extension spring for your garage door, much like our own chart below.

Installation Tips

When replacing your garage door extension springs, here are some tips to keep in mind:

  • Replace both springs to ensure your garage door remains properly balanced
  • Use this opportunity to replace old garage door hardware, such as pulleys and rollers. Your garage door uses springs, pulleys, and rollers in conjunction with each other. Making sure that these components are in good shape and are working in harmony is an essential step to ensure you have a smooth, silent garage door.
  • Make sure you are installing the correct type of springs. Note that this guide covers extension springs intended for sectional garage doors, which are not the same as torsion springs.

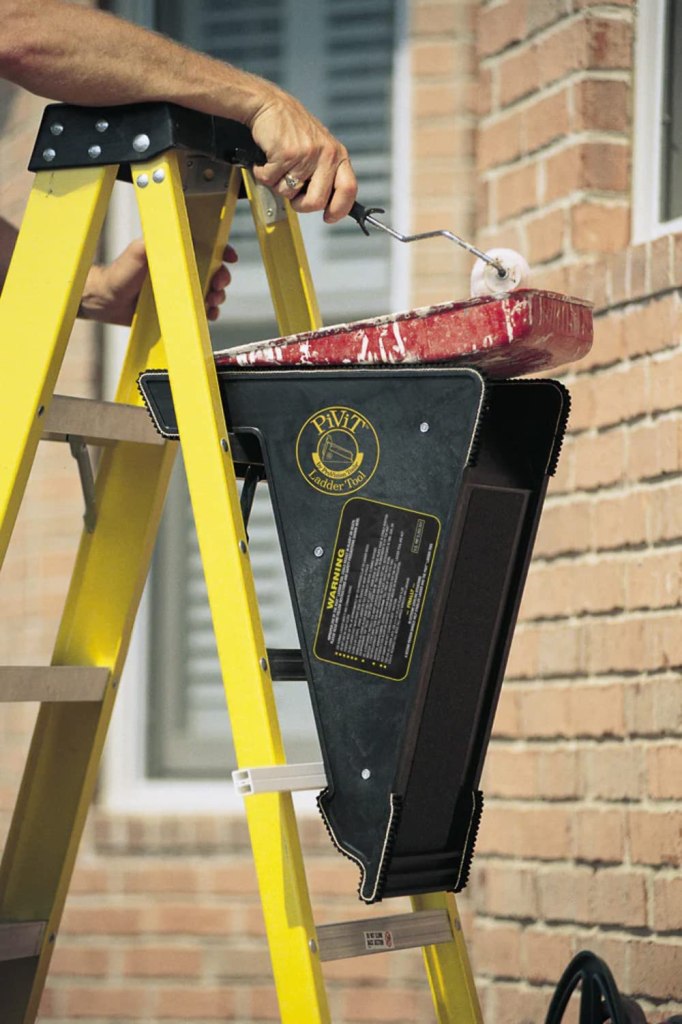
Installing Garage Door Springs

For a thorough guide on installing garage door springs, check out our installation video. In this instance, a visual representation will better guide you to properly install your garage door extension springs. You can also follow along with the brief overview list below:

  1. Open your garage door, and block it from closing
  2. Disengage your electric door opener
  3. Unhook the s-hooks and remove your garage door pulleys
  4. Remove the old springs and safety extension cables
  5. Pass the safety extension cable through the new spring
  6. Hook the spring to the attachment hook on the rear hanger bar
  7. Attach the safety extension cable to the slotted angle bracket nearest to the stationary pulley
  8. Attach the pulley onto the spring, and thread the extension cable onto the pulley
  9. Pull the extension cable until fully tensioned to the initial s-hook position and reattach it

With that, your garage door should be set to operate for a number of years without the need to replace its springs.

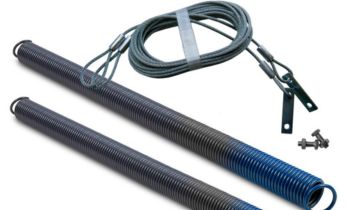
Ready to replace them? Check out Ideal Security’s Garage Door Extension Springs, tested for up to 15,000 cycles. While you’re at it, consider revamping your garage door entirely with tried and tested pulleys and rollers.

If you’re on the fence about replacing your garage door rollers, or don’t know what type of roller to select, check out this article where we dive deep on the function and types of rollers.

From Ledges to Legs: Exploring Accessories for Using Ladders on Stairs, Uneven Surfaces, and Roofs

Ladders, in their many styles and sizes, are essential tools for a variety of tasks. Whether you’re simply trying to reach high places from shelves to lightbulbs, or working on projects from construction and HVAC to painting and gutter repair, a ladder is a necessary addition to your toolkit.

However, not all ladders can be safely used without a few supplemental accessories or bits of hardware. Without proper ladder safety tools, you run the risk of sacrificing both efficiency and safety.

When Ideal Security began developing the Ladder-Aide family, we took a good, long look at all the other accessories out there to see what they did right, what they did wrong, and what was missing from the market. It’s after years of extensive research, trial, and error that we were able to confidently put out tools like the Ladder-Aide PRO, and it’s those years of research that we’re using as the foundation for this guide to help you make sure you’ve got the right tools for the right job.

In this article, we’ll be delving into the world of accessories and supplements for using a ladder on stairs, slopes, roofs, and more, to provide guidance and shed some light on the pros, cons, and general use cases of different ladder accessories.

  1. Ladder Leg Levelers
  2. Ladder-Aide PRO
  3. Ladder Stabilizers
  4. Ladder Roof Hooks
  5. PiViT LadderTool
  6. And more…

Note: None of the links below are affiliate links – we receive no payment or bonuses when you click on them. They’re just starting points to help you discover tools and come to your own conclusions.

Ladder Leg Levelers

Leg levelers are a versatile choice to stabilize your ladder on uneven ground or give your ladder a boost of height. Though they come in various models and makes, these accessories are largely similar in assembly and use. As the name implies, they’re affixed to the legs of your ladders with screws or bolts, with some leg levelers intended as a permanent installation or addition to your ladder.

While this does result in an element of added weight and an inability to easily use other accessories that affix to your ladder’s legs, you’ll be left with an addition that should prepare your ladder for almost any situation. Note that you may need to have your own hardware prepared to install leg levelers.

Levelok's Keylock Quick Connect Ladder Leveler, in use and installed on a ladder.

Photo: Levelok Keylock Quick Connect

Sounds like the tool for you? You can begin your Leg Leveler journey by checking out LeveLok’s Ladder Lever Stabilizer – but be sure to do some research and check out the other options out there.

Ladder-Aide PRO

“Didn’t you just talk about this?”, the astute reader may ask. And if you didn’t, you should. While the Ladder-Aide PRO technically is a ladder leg leveler, it does a few things differently than other levelers. For one, it’s not trying to beat around the bush by adding a bunch of features that aren’t a part of the name.

Like conventional ladder levelers, the Ladder-Aide PRO levels your ladder and helps you put a ladder on stairs. Plain and simple. Because of that simple and straightforward approach, the Ladder-Aide PRO does one thing, and it does it well. Designed specifically for aluminum and fiberglass extension ladders, the steel-constructed Ladder-Aide PRO creates a safe, stable, micro-adjustable, and level platform for ladders – on stairs. If you’re a professional or DIYer looking for a reliable accessory to work safely on stairs, the Ladder-Aide PRO is the go-to option.

And unlike the aforementioned leg levelers, the Ladder-Aide PRO does not affix to your ladder at all. It’s a separate component that can be easily assembled and compactly disassembled in under a minute, no special tools required. You can pick it up, carry it around, put it down, and it won’t go anywhere with its anti-skid rubber grips – the same type found on the legs of most ladders.

The Ladder-Aide PRO is specifically designed for use on stairs, which means it’s best suited for the pros who spend a good chunk of their time on stairs such as painters, electricians, HVAC technicians, building maintenance technicians and more. Designed for pros, it’s been rigorously tested to withstand up to 1500 lbs. and complies with OSHA standards for ladder use.

The Ladder-Aide PRO, a ladder leveling tool to safely use ladders on stairs.

Photo: Ideal PRO Ladder-Aide PRO

Ladder Stabilizers

It’s easy enough to prop a ladder up against a wall, but where’s the guarantee that it’ll stay there? That’s where ladder stabilizers come in. Affixed to the top of your extension ladder, stabilizers reduce the side-to-side sway of your ladder with two long, curved arms and rubber end caps that rest against the wall or ledge you’re working on.

With this added layer of safety, you can focus more on the work that requires extensive side-to-side movement, like siding or painting, without the fear of leaning too far and falling or getting swept off your ladder by unexpected winds. Ladder stabilizers come with the added benefit of propping your ladder away from your work surface to ensure that your ladder doesn’t scrape or damage it – a benefit that’s especially handy if you’re working on or near a window or fragile surface.

But don’t feel invincible just yet. While ladder stabilizers may be rated for different weight loads and types of ladders, they don’t necessarily account for the added weight of other supplements or tools you may be using. Again – we’re working by adding layers of safety. There’s no one tool that’s the be-all and end-all of ladder accessories.

The AC78 QuickClick Ladder Stabilizer from Werner, a tool which keeps ladders steady when leaning against walls.

Photo: Wernet AC78 QuickClick Ladder Stabilizer

A stabilizer like the AC78 Werner Ladder Stabilizer may be the tool for you, but we again urge you to do your own comparisons and research.

Ladder Roof Hooks

With curved hooks that loop around the rungs of your ladders and additional hooks that secure over the top of roofs, ladder hooks for roofing keep your ladder stable and secure when working on slanted roofs.

Note that not all roof ladder hooks are built the same. Some come with wheels to make sliding and positioning your ladder in place easier, though users may argue that the wheels are a safety hazard – especially so if they fully rotate, which may cause your ladder to move side-to-side while getting it in place. Some models additionally have rubber on the roof-hook portion, though these serve the purpose of protecting your roof from damage instead of furthering your security – but still a bonus in our eyes, all the same.

You do want to keep an eye out as far as individual manufacturers go. Different hooks may have different load bearing capabilities, come with or without wheels, and have different hook styles. Be sure to have these elements in mind when picking out the right roof hook for you.

OSI Distribution's Acro 11084 Ladder Hook, a tool to hook ladders onto sloped roofs.

Photo: Acro 11084 Roof Ladder Hook

One such ladder roof hook is OSI Distribution’s Acro 11084 Ladder Hook, which features one of the aforementioned wheels. You know the drill – do some additional research to find the best roof hook for your purposes, and your ladder.

PiViT LadderTool

There’s no denying that the PiViT LadderTool gets a lot done, and it wouldn’t be a stretch to consider it a multi-tool of ladder accessories.

This unassuming polystyrene triangle fits the role of ladder stabilizer, ladder jack, ladder shelf, and tool carrier, easily being a tool that does more than meets the eye, and valuable to have in a pinch. It can be used on roofs with the help of a roof boot, uneven ground, stairs, and be placed directly on ladders to create makeshift platforms, no assembly or affixing required – the lightweight PiViT, as is, can be used in all the above scenarios without any tweaking necessary and it can withstand up to 500 lbs. of weight.

In order to fit all these niches, it’s worth keeping in mind the few concessions that had to be made in order to make the PiViT as adaptable as it is. Note that the PiViT can only accommodate certain degrees of slopes for uneven surfaces and roofs, and that it can’t be used on metal or rile roofs. Because of its fixed shape and lack of adjustability, it may not fit on all stairs, so be sure to measure and make sure the PiViT can safely fit on your stairs.

Be sure to follow PiViT’s instructions to a T, and you’ll be left with a ladder accessory that punches well above its weight and gets a lot done right.

PiViT LadderTool, a multi-purpose ladder accessory.

Photo: PiViT LadderTool

And more…

Keep an eye on this article! We’ll be updating it periodically with more vital ladder accessories and tools to know about and keep in your arsenal. If you have any suggestions or recommendations for tools you’d like to see listed in this article, let us know at info@idealinc.com.